Part 3 is the final two-week group component of the project.
In Parts 1 and 2 you implemented the mechanics of character animation: forward kinematics, skinning weights, one-hot attachment, and linear blend skinning. Now you will use that pipeline to make a short animated scene with human characters.
The goal is simple: make a coherent, good-looking animation that is at least 30 seconds long. Build a rough scene in the GF5 scene motion editor using the provided motion library, then add custom avatars, generated motions, camera changes, or other tools as needed.
Learning Goals
By the end of Part 3, you should be able to:
- describe a character-animation pipeline that connects motion data, a skeleton, a skinned mesh, and a final render
- compose longer animation sequences from shorter motion clips by reasoning about timing, placement, facing direction, and transitions
- explain how a custom or reconstructed character can be driven by a shared animation skeleton
- compare alternative motion, avatar, and rendering choices using visual evidence
- identify common artifacts such as foot sliding, scale mismatch, skinning errors, retargeting errors, or appearance loss
- document a creative technical workflow clearly, including any external tools, generated assets, or AI tools used
What To Build
Work in groups of two. Create a short animated scene featuring virtual human characters.
The focus is not to build a full animation package. The focus is to connect the ideas from Parts 1 and 2 to a more realistic character-animation workflow while making sensible creative and technical choices.
A Simple Way To Work
- Build a rough scene with the provided motion library.
- Preview it on the
SMPL-24 Proxy, then adjust timing,Path, and facing. - Save the scene as a
.scene.jsonfile. - Try custom avatars, generated motions, or other tools as needed.
- Render the final video and improve the result as much as you can.
Tools Provided
The tools below are the main materials available for Part 3.
Step 1: Explore The Scene Motion Editor
The GF5 scene motion editor contains the bundled Part 3 motion library.
From the repository root, launch the editor:
python viewer/scene_web_server.py --port 8093The browser normally opens automatically. The local URL is http://localhost:8093.
The scene editor lets you preview motion presets, arrange clips on character tracks, edit the Path control and facing direction, and export drafts while you shape the animation. For a fuller walkthrough of every panel, file location, shortcut, and export option, see the Scene Editor Manual.
Important: Path controls the character root trajectory. This is separate from the prescribed motion clip, which controls the local body pose over time. For example, a walk cycle can be reused with different Path settings, and a gesture can stay mostly in place while still using a chosen root position.

Use the SMPL-24 Proxy and the provided motion categories as your starting point. The bundled presets are grouped by how they should be used. Standing / Gesture clips are intended to stay on one spot, although the pelvis may still bob or move vertically inside the pose. Travel Loops and Travel Transitions are intended to follow the Path trajectory, Turns are intended to change facing direction, and Special Actions are larger spot-action or original-travel beats.
Use the editor to:
- add one or more characters to the scene
- place clips on a character timeline
- try combining different preset motions
- adjust timing,
Path, and facing direction - preview whether the action reads clearly on the
SMPL-24 Proxy - save the scene as a
.scene.jsonfile - export a short draft video or screenshot for comparison
For useful preset motions, note:
- the motion name or source file
- what action the motion represents
- its approximate duration
- whether it works best on the spot, with a changing
Path, or as a turn - whether it contains contact-sensitive movement such as walking, jumping, or sitting
- any obvious artifacts when previewed on the proxy character
A good scene usually starts from a small number of readable actions. For example: a character walks in, turns, waves, waits, and exits; two characters cross paths and react; or a short group routine uses a loop, a gesture, and a final pose.
Tool: Try A Custom 3D Avatar For Rendering
The GF5 UP2You demo creates a custom virtual character for rendering using UP2You.
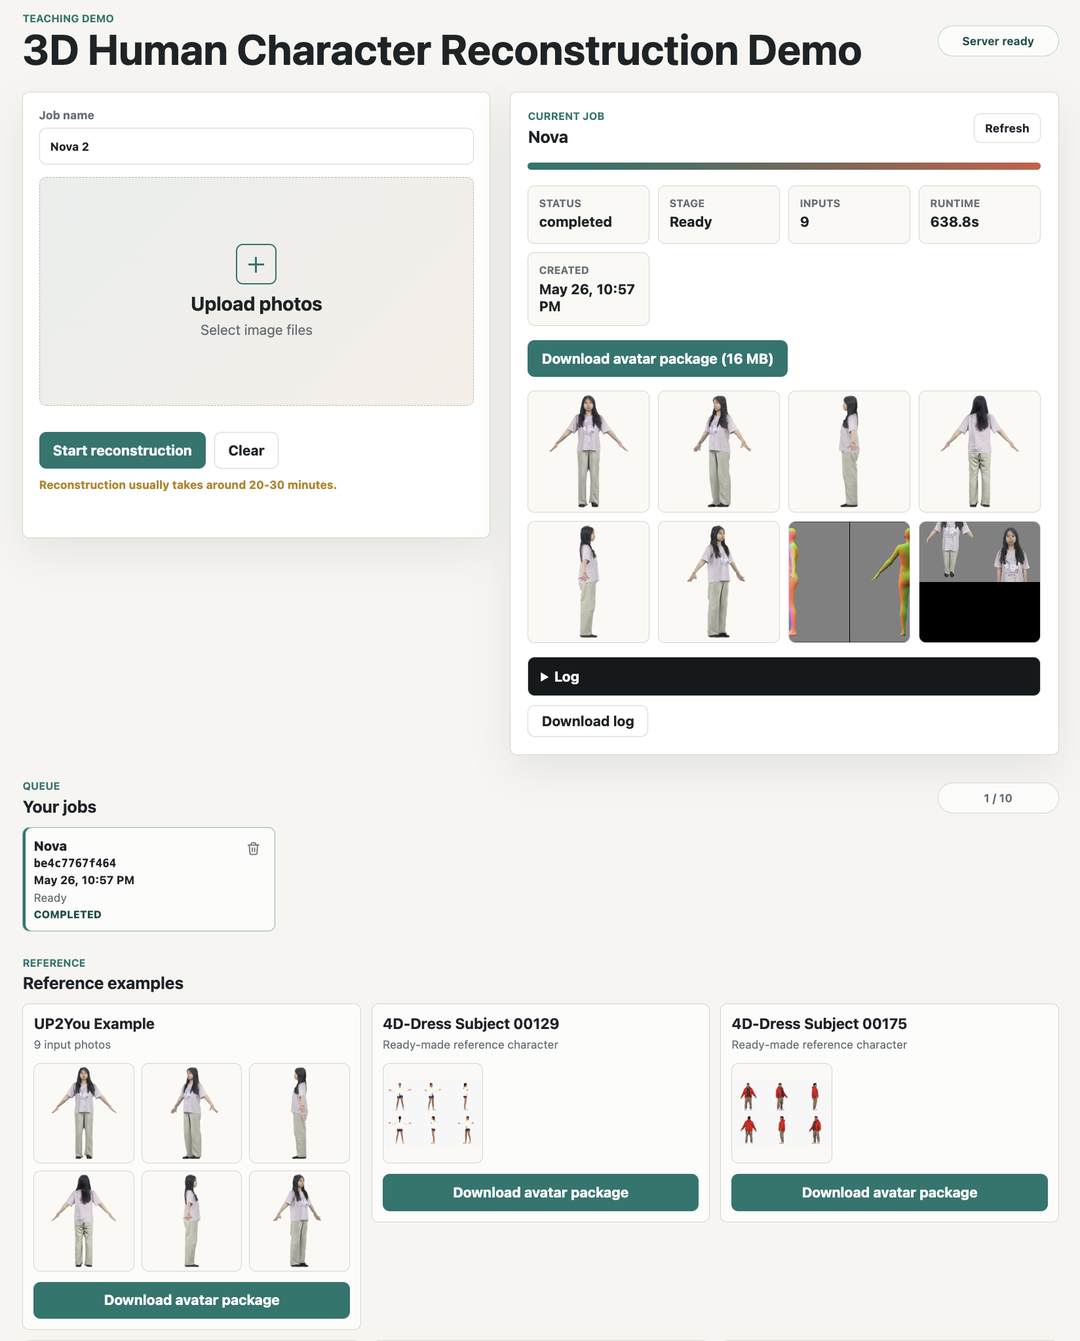
Downloaded avatar packages go in libraries/avatars/. Extract each ZIP into its own named folder. The scene editor lists built-in blocky characters, local SMPL models when installed, and extracted avatar packages in the Final avatar dropdown after a page refresh. The ZIP file by itself is only an archive; the editor needs the extracted layout. The OBJ stores the visible character mesh, and the NPZ stores how that mesh follows the SMPL-24 course body skeleton during animation. For example:
libraries/avatars/alex/outputs/animation_lowres.obj
libraries/avatars/alex/outputs/animation_lowres_skinning_weights.npz
libraries/avatars/alex/outputs/smplx_mesh.obj
Useful checks for custom avatars:
- inspect the mesh from several camera angles
- check scale, orientation, and appearance
- compare the avatar render against the
SMPL-24 Proxypreview - note artifacts such as foot sliding, skinning collapse, clothing deformation, or color loss
Tool: Generate Custom Motion With HY-Motion-1.0
HY-Motion-1.0 can generate short candidate motions from text prompts: HY-Motion-1.0 demo.
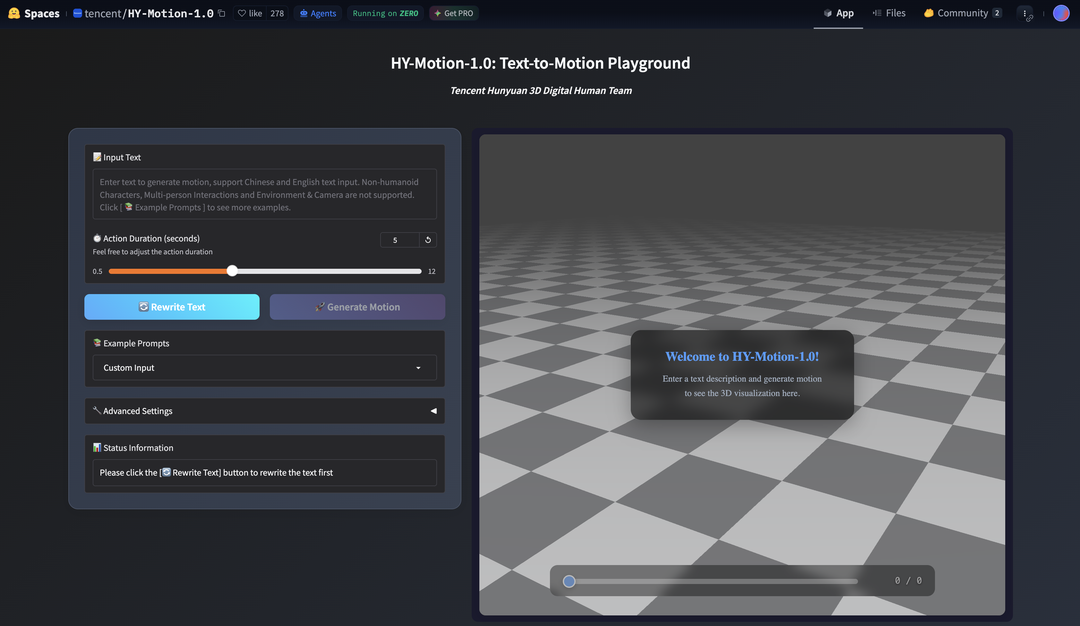
Good prompts describe one physical action:
A person turns left and waves.A person walks forward and stops.A person points forward with the right hand.A person performs a short dance step.A person stands still and raises both arms.
For more prompt ideas, look at the examples provided on the HY-Motion-1.0 demo page.
After downloading a HY-Motion result, keep the .fbx animation file and the matching .txt prompt file together. They must have the same base filename, for example:
wave_to_camera.fbx
wave_to_camera.txt
In the GF5 scene editor, click Import HY-Motion in the Motion Library panel and select both files. The editor converts the pair into a custom GF5 motion clip under libraries/motions/custom/, refreshes the library, and lists the result as a Custom: motion.
Improve Rendering Quality
Try to make the final animation look better. Use whatever tools are useful, including external renderers, AI tools, custom assets, or your own workflow.
Possible starting questions:
- Should we adjust the camera trajectory or framing?
- Is it possible to add a background scene or simple environment?
- How can the motion or avatar look more realistic?
What about lighting, shadows, ground contact, texture quality, foot sliding, motion timing, multi-character staging, or a better export path? Brainstorm ideas and try out different online or local tools.
Final Report
See instructions on the Final Report page.
Skeleton Note
GF5 uses SMPL-24 as the shared 24-joint body skeleton for Part 3. This is the same body-skeleton idea used in Parts 1 and 2, now applied to human motion clips: the proxy character, motion presets, skinning weights, and custom avatars all need to agree on the same SMPL-24 joint layout.
Some reconstruction tools, including UP2You, use SMPL-X internally while fitting the avatar. SMPL-X is more detailed than SMPL-24: for example, it includes face, jaw, eye, and detailed hand/finger joints, while the Part 3 SMPL-24 skeleton keeps one coarse left_hand and right_hand joint. The exported GF5 avatar package maps the reconstructed mesh back to the SMPL-24 skeleton, so it can follow the same motions as the SMPL-24 Proxy.
What To Bring To Help Sessions
Bring enough context that we can see what you are trying to do.
- show the editor, a screenshot, or a short clip
- point to the part that feels wrong or unfinished
- bring one concrete question, idea, or experiment you want to try
That is enough; the session can stay practical and conversational.